Hardware setup
1.4 Hardware Setup#
Installation and Fixing#
-
Use four M4*10 screws to secure the robotic arm to the base fixing plate (the arm can be positioned at three different angles).


-
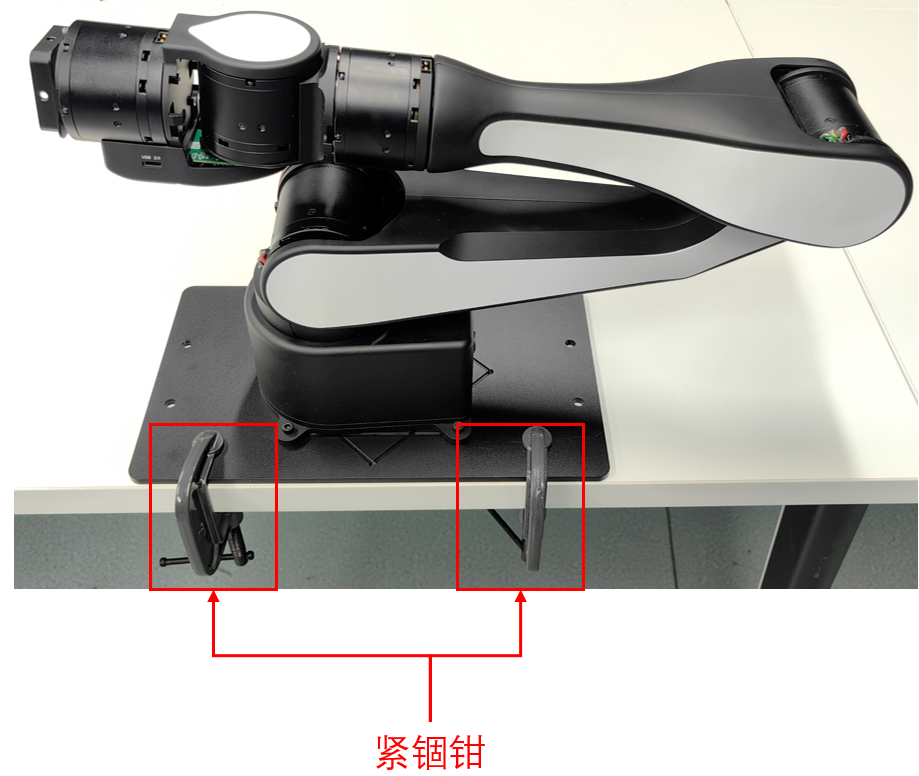
Use two locking clamps to secure the adapter plate to the desktop, as shown in the image below.
Power Supply#
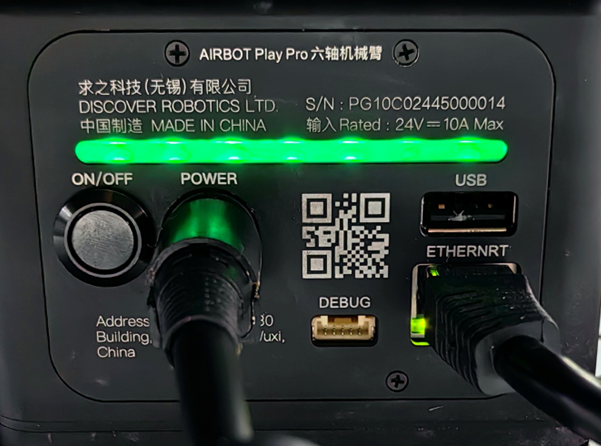
- Connect the power cable to the power port on the robotic arm. Ensure that the power supply is in the required range for safe operation.
- Connect the Ethernet cable to the Ethernet cable port as indicated in the image below.
Once these steps are completed, your AIRBOT Play robotic arm will be ready for operation.