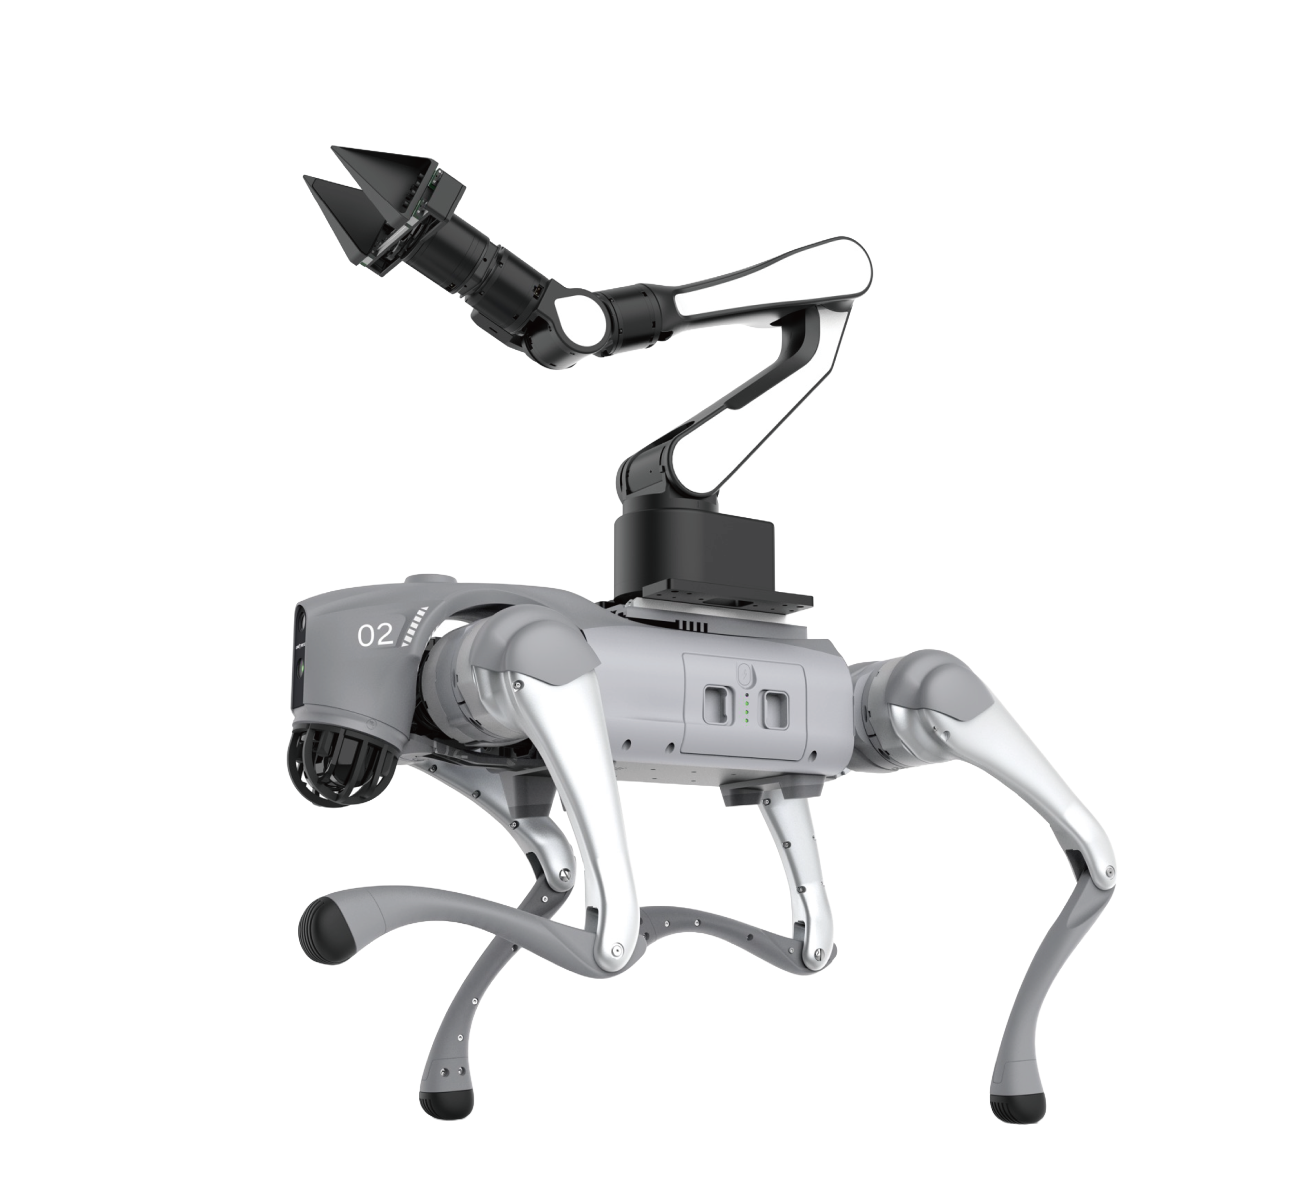
Starting Physical-Robot Teleoperation#
This chapter guides you through the complete process, from system configuration to startup and operation.
Preparation#
-
Check the hardware status
- Check that the GO2 base, robotic arm, and dexterous hand are powered correctly.
- Make sure all devices are in their initial safe state.
- Check that the VR equipment and data glove have sufficient charge.
-
Check the network environment
- Make sure that the GO2, control computer, and PICO VR headset are on the same LAN.
- Verify that network latency meets the requirement (<100ms).
Step 1: Configure System Parameters#
Basic Communication Configuration#
# Edit task.yaml and make sure it contains the following core parameters:
# The end effector is a gripper
# 1. Basic SDK type
arm_sdk_type: thin

# 2. Device types
eef_type: gripper           # The end effector is a gripper
vr_device: pico_webrtc      # VR device type
arm_device: pico            # Robotic-arm control device
hand_device: pico           # Gripper control device

# 3. GO2 mobile platform configuration (if using the GO2)
device_type: go2
network_interface: wlp0s20f3  # Replace with the actual host-computer network interface name
Left-/Right-Hand Preference#
# Select the dominant control hand
handedness: right    # Right-hand control configuration
# handedness: left   # Left-hand control configuration
Important:
- Restart the system after changing the configuration file for the changes to take effect.
- Make sure that the network interface name matches the actual network interface on the host computer.
- Control mappings strictly follow the configured
handednessparameter. - Before operation, make sure that all control devices are worn correctly and connected.
Step 2: Start the System#
Start the VR Controller#
-
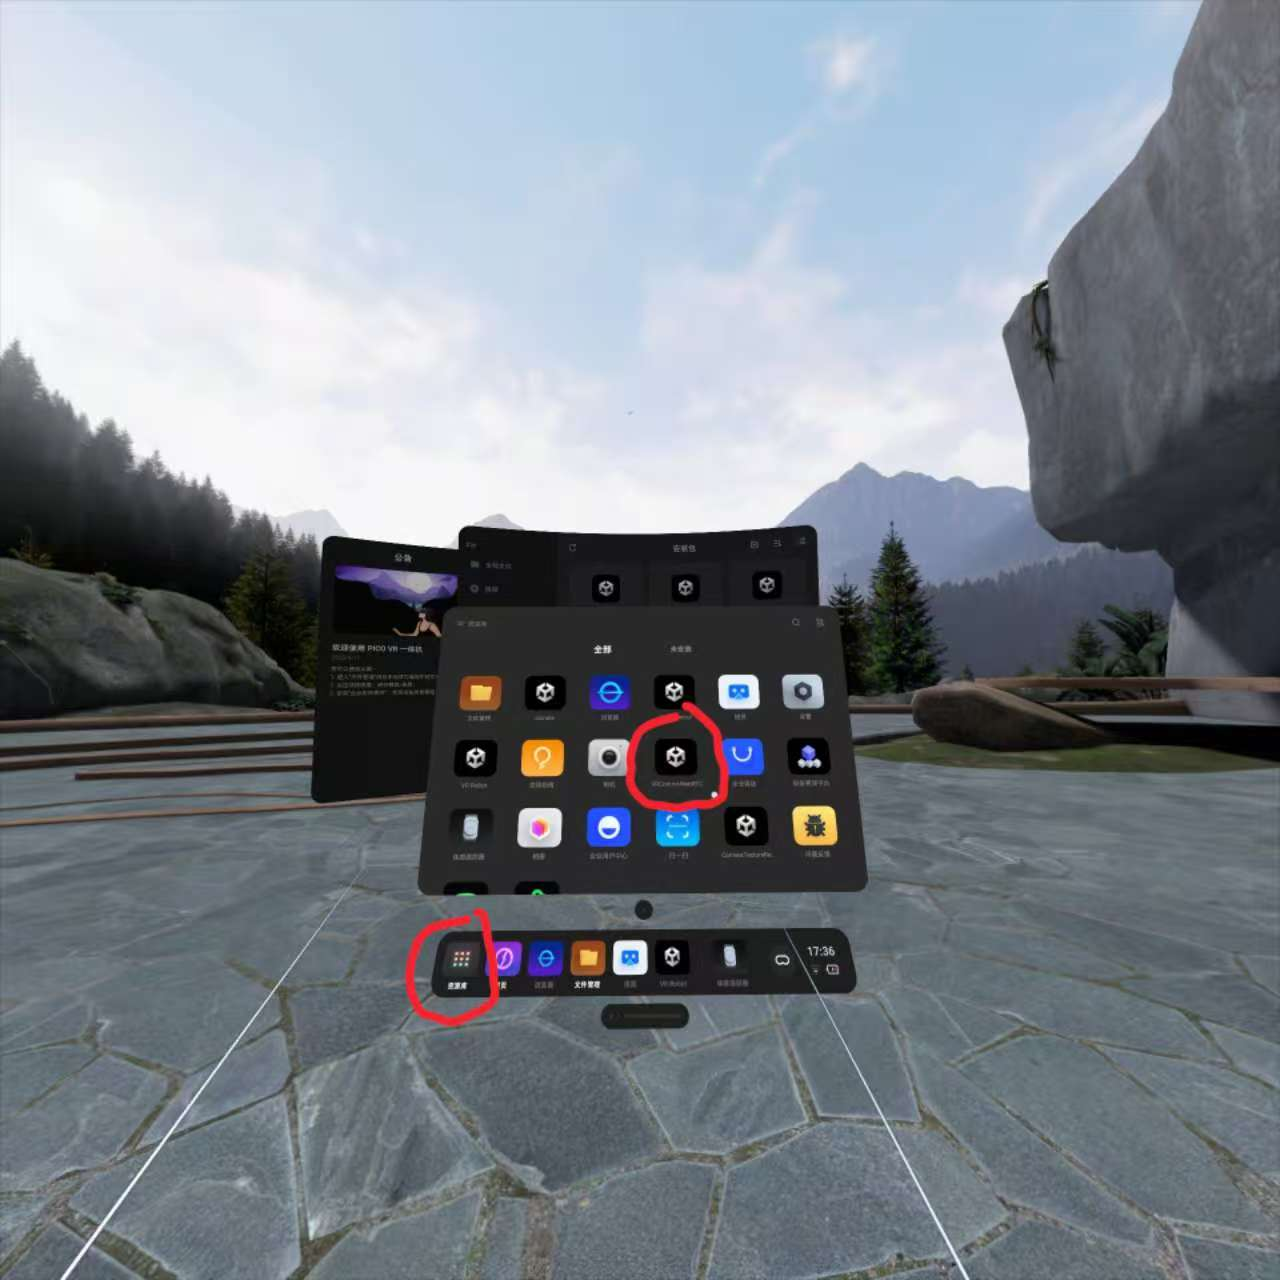
Run the
VRControlWebRTCapp on the PICO VR headset.Note: The PICO and host computer must be on the same LAN.
-
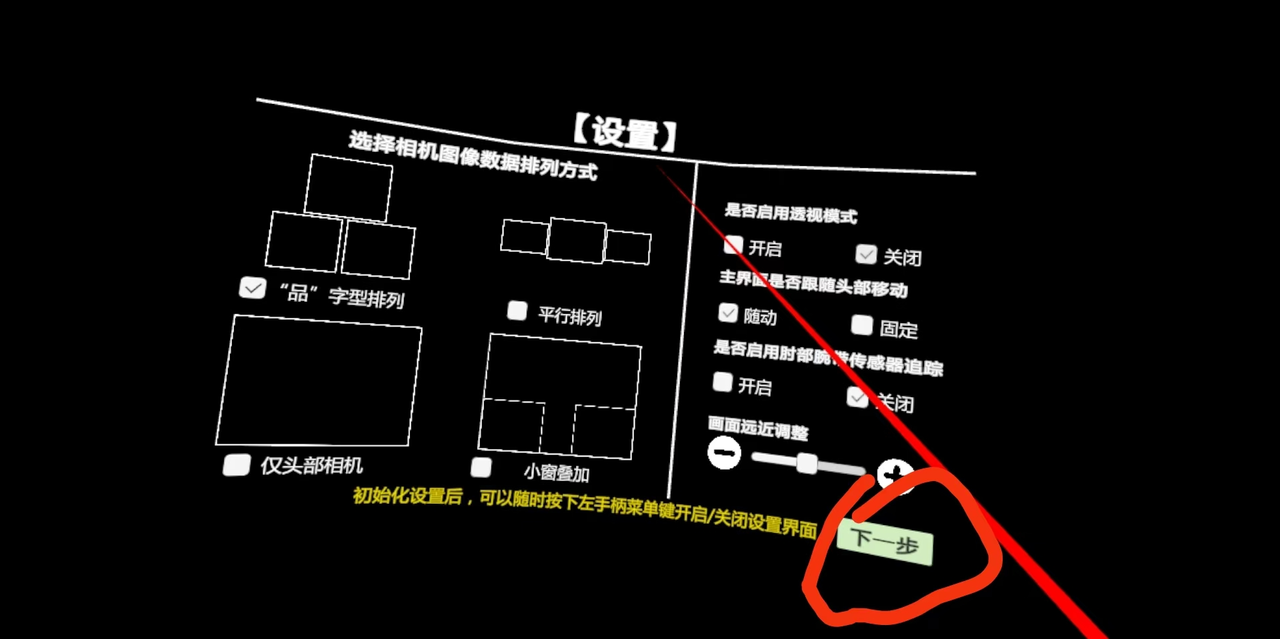
Enable Elbow Wristband Sensor Tracking.
-
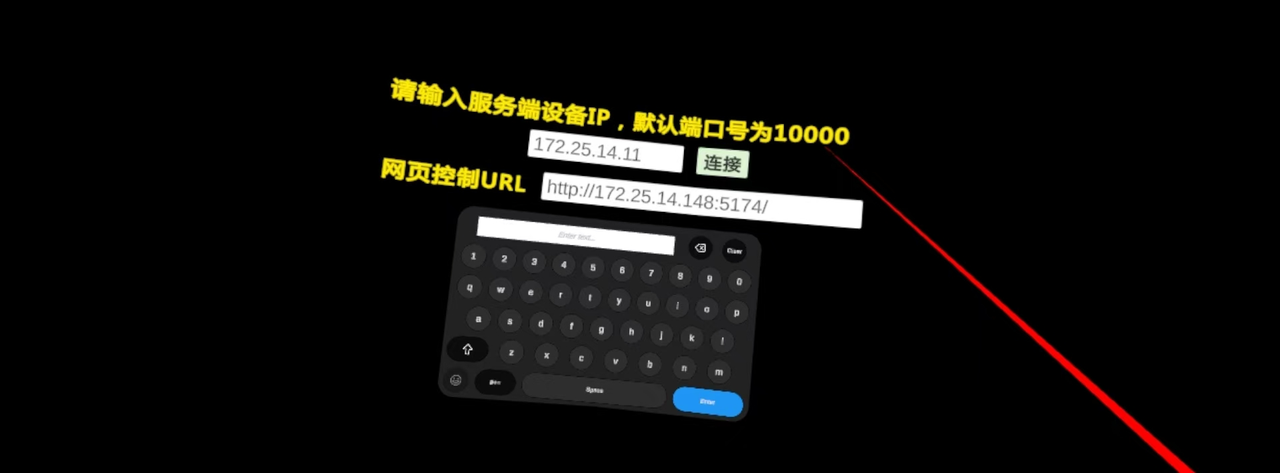
Set the destination IP to the address of the GO2 NX board and establish a connection.
-
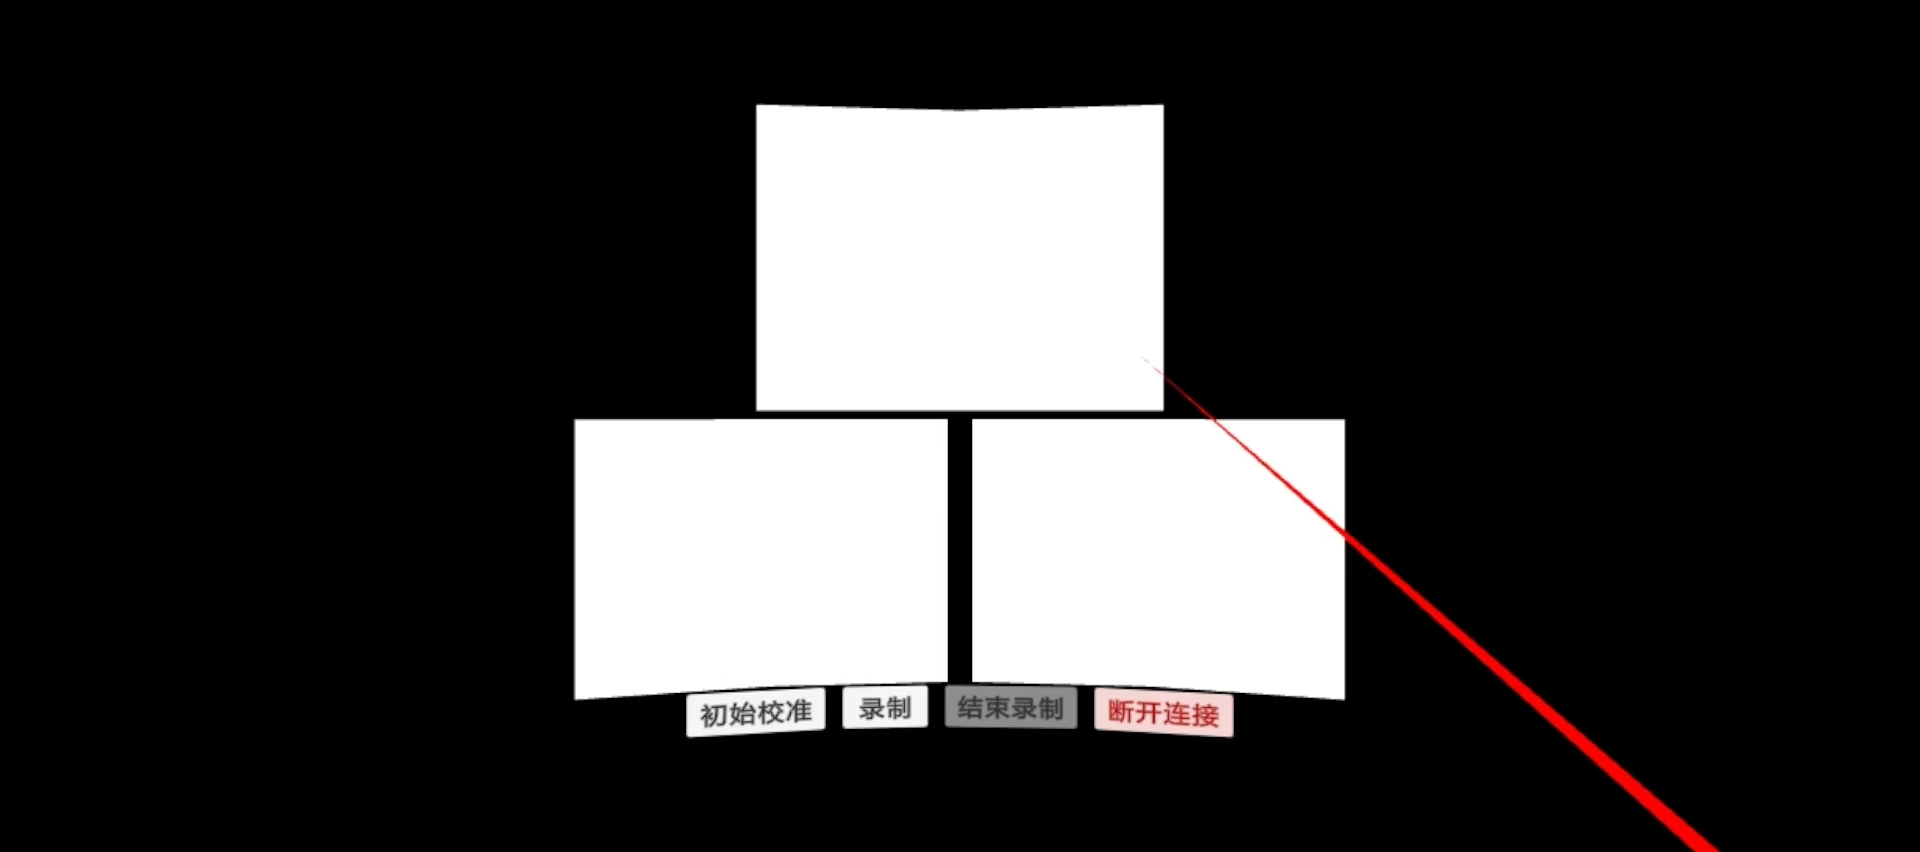
The following screen indicates that the controller is running successfully.
Start the Main Control Program#
-
Run:
-
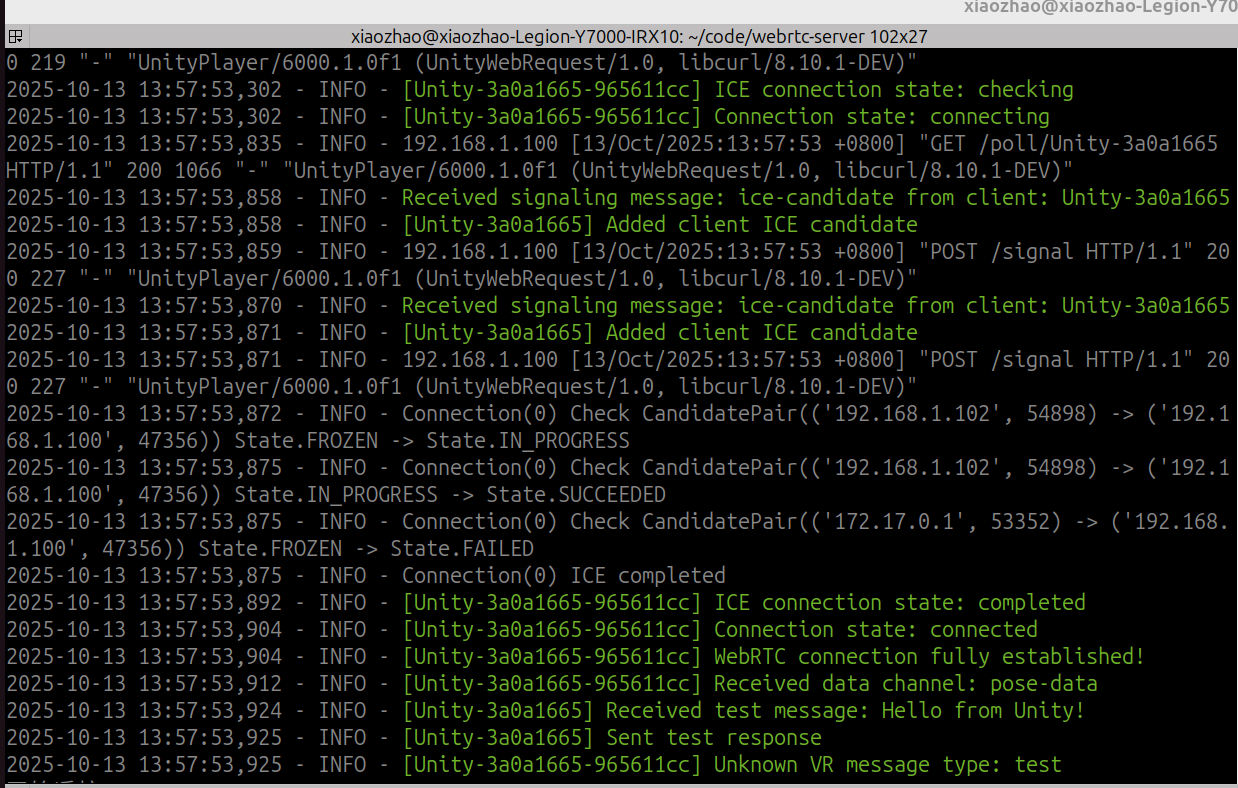
If the terminal shows the output in the following figure, the connection is successful. Otherwise, select Disconnect in the PICO app and reconnect.
If startup fails, troubleshoot in this order:
- Check network connectivity.
- Verify the configuration-file path and parameters.
- Check that the Docker container is running.
- Re-establish the VR connection.
Step 3: Operating Instructions#
After the system starts successfully, teleoperation control begins. Follow the appropriate control configuration below according to the
handedness(left-/right-hand preference) parameter intask.yaml.
VR Controller Buttons#
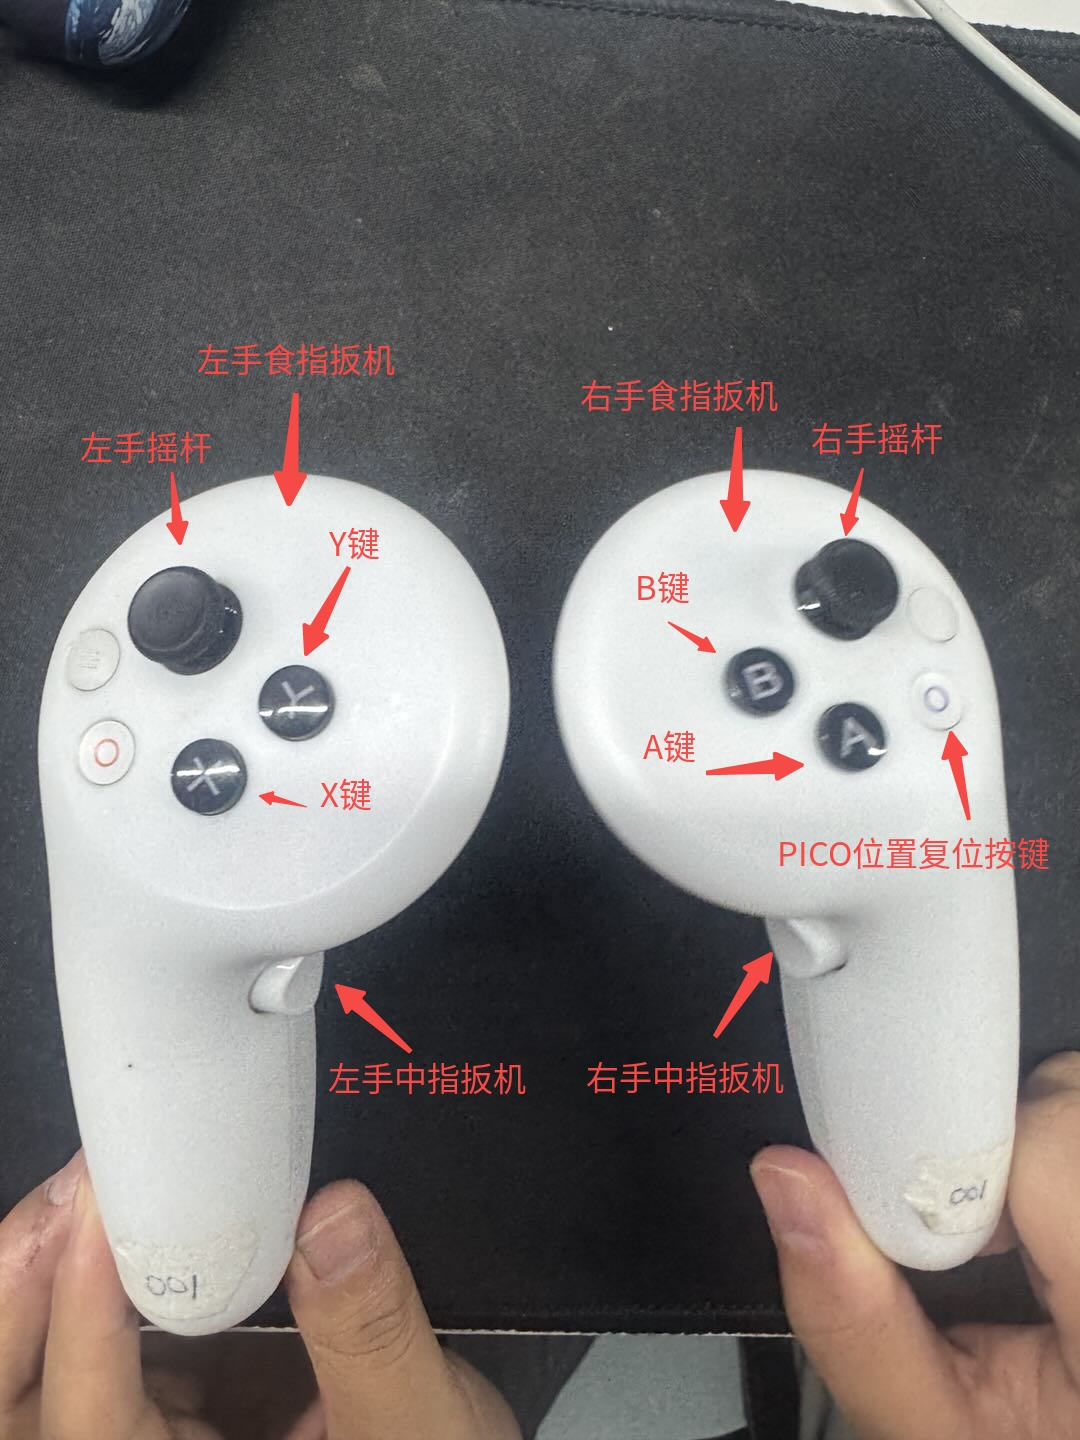
The VR controller buttons are shown below:
Control Mapping#
Right-Hand-Dominant Mode (handedness: right)#
In this mode, your right hand performs fine manipulation, while your left hand controls the system and locomotion.
-
Right hand (manipulation hand)
- Wear the data glove: Directly controls the dexterous hand's grasping motion with one-to-one synchronization.
-
Left hand (control hand)
-
Control GO2 locomotion:
- Left middle-finger button: Makes the GO2 stand or sit.
- Left joystick: Moves the GO2 forward or backward and turns it.
-
Control the robotic arm:
- X button: Enables robotic-arm control.
- Index-finger trigger: Hold to start synchronizing the robotic-arm end-effector position; release to stop synchronization.
- Y button: Returns the robotic arm to its initial safe state.
-
Left-Hand-Dominant Mode (handedness: left)#
In this mode, your left hand performs fine manipulation, while your right hand controls the system and locomotion. All operations mirror right-hand-dominant mode.
-
Left hand (manipulation hand)
- Wear the data glove: Directly controls the dexterous hand's grasping motion with one-to-one synchronization.
- Wear the wrist tracker: Uses arm motion to control the position and orientation of the robotic-arm end effector.
-
Right hand (manipulation hand)
-
Control GO2 locomotion:
- Left middle-finger button: Makes the GO2 stand or sit.
- Left joystick: Moves the GO2 forward or backward and turns it.
-
Control the robotic arm:
- A button: Enables robotic-arm control.
- Index-finger trigger: Hold/release to start/stop robotic-arm synchronization.
- B button: Returns the robotic arm to the zero position.
-
| Device Component | Control Function | handedness: right |
handedness: left |
|---|---|---|---|
| GO2 mobile platform | Stand/sit | Left middle-finger button | Right middle-finger button |
| Move and turn | Left joystick | Right joystick | |
| AIRBOT Play robotic arm | End-effector pose control | Right wrist tracker | Left wrist tracker |
| Enable control | Left X button | Right A button | |
| Start/stop synchronization | Left index-finger trigger (hold/release) | Right index-finger trigger (hold/release) | |
| Return the robotic arm to zero | Left Y button | Right B button | |
| Dexterous hand | Grasp synchronization | Right data glove | Left data glove |
Recommended Operating Procedure#
- Preparation: Make sure all devices are worn correctly and that the operating area is open and free of obstacles.
- Start the GO2: Use the corresponding middle-finger button to make the GO2 stand up from its prone position.
-
Control the robotic arm:
- First press the enable control button (X or A) to activate the robotic arm.
- Hold the corresponding index-finger trigger to start controlling the robotic-arm end effector with the wrist tracker.
- To pause control, release the trigger. To return the robotic arm to its initial pose, press the zero-position button (Y or B).
-
Operate the dexterous hand: Perform grasping motions with the data glove; the dexterous hand synchronizes in real time.
- End operation: First return the robotic arm to zero, then use the middle-finger button to make the GO2 sit, and finally shut down the system according to the normal procedure.