Quick Setup
> Stage 4: VR Device Deployment and Instructions (PICO4)
Installing and Testing the VR App#
This section explains how to install and verify the software on the PICO all-in-one VR headset.
Step 1: Enable Developer Mode#
- Turn on the PICO all-in-one VR headset.
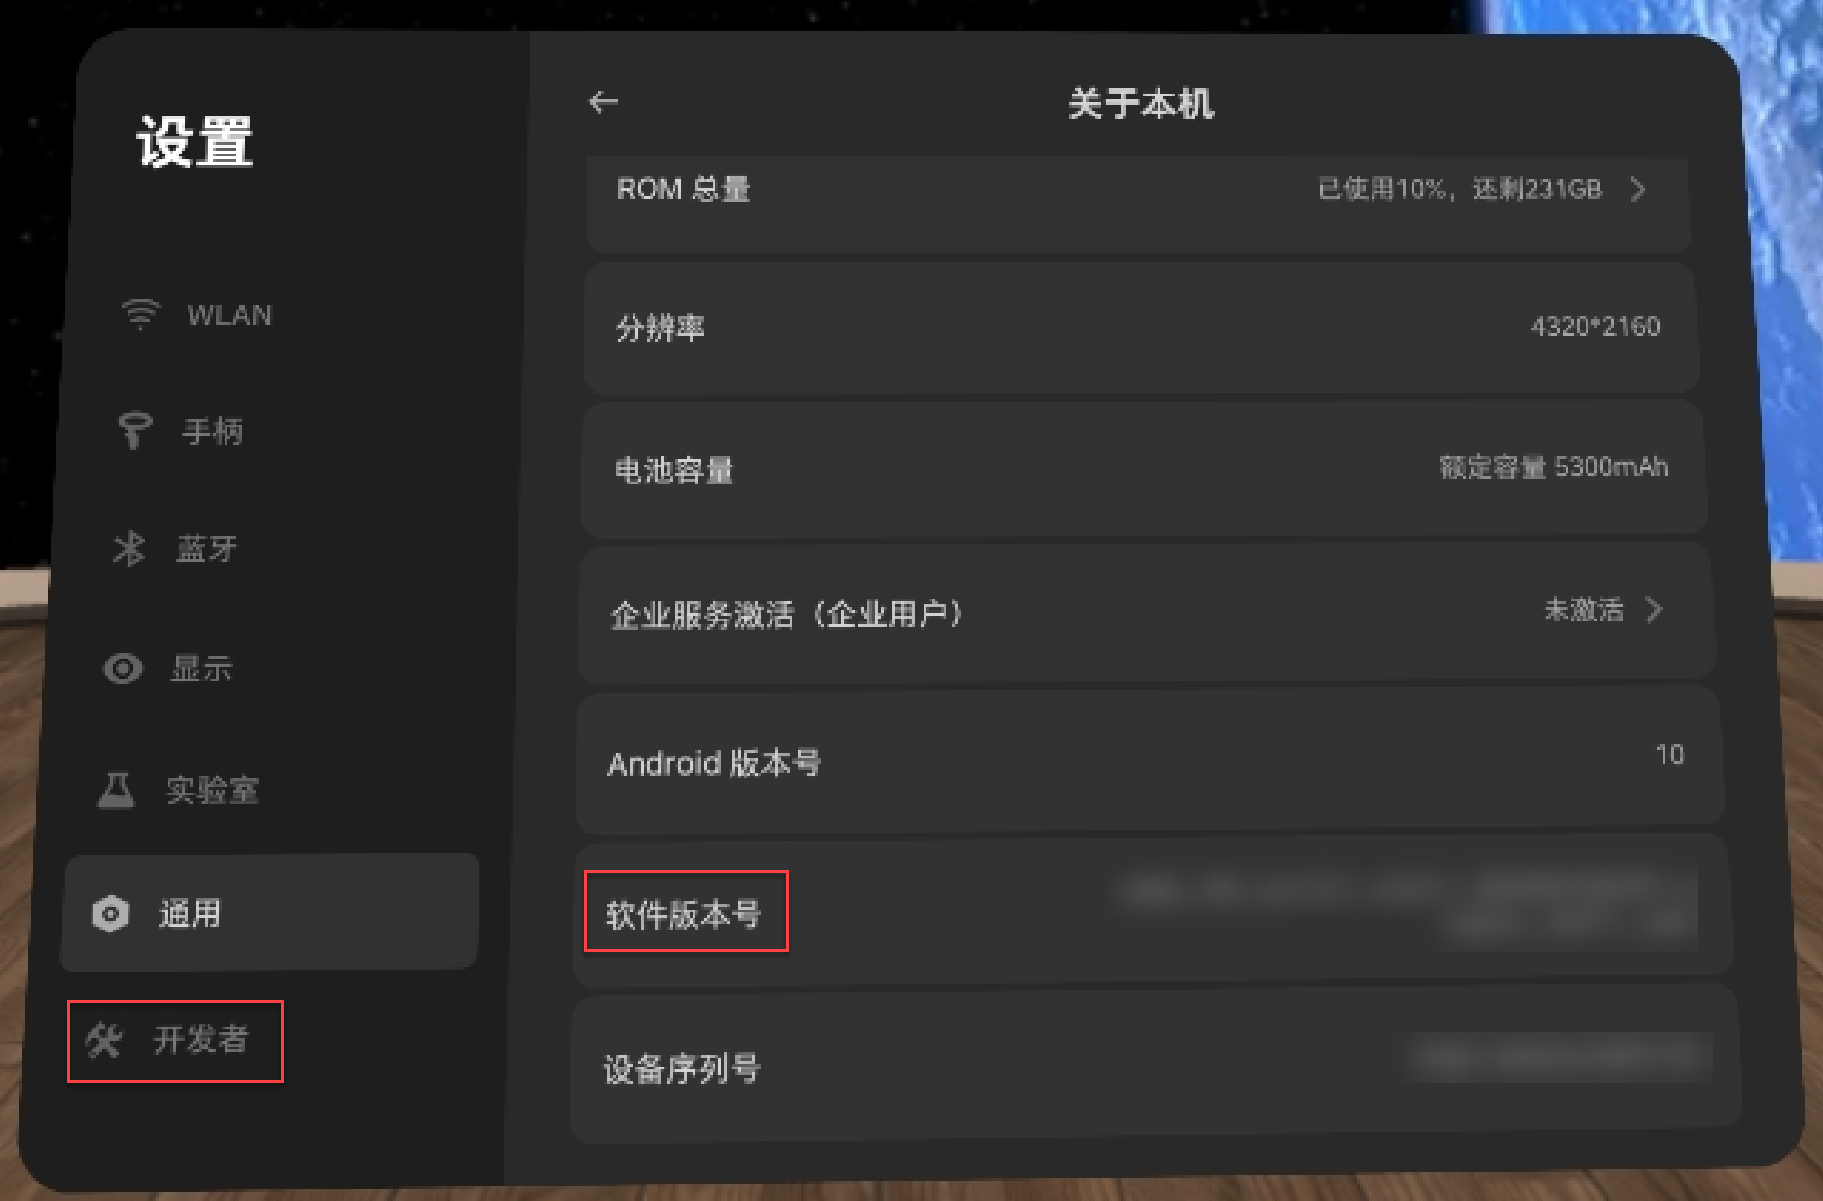
- Go to Settings > General > About.
- Move the pointer to Software Version and click it rapidly several times (approximately 7 times), until the system displays “You are already a developer” or a Developer option appears in the navigation bar on the left.
Step 2: Enable USB Debugging#
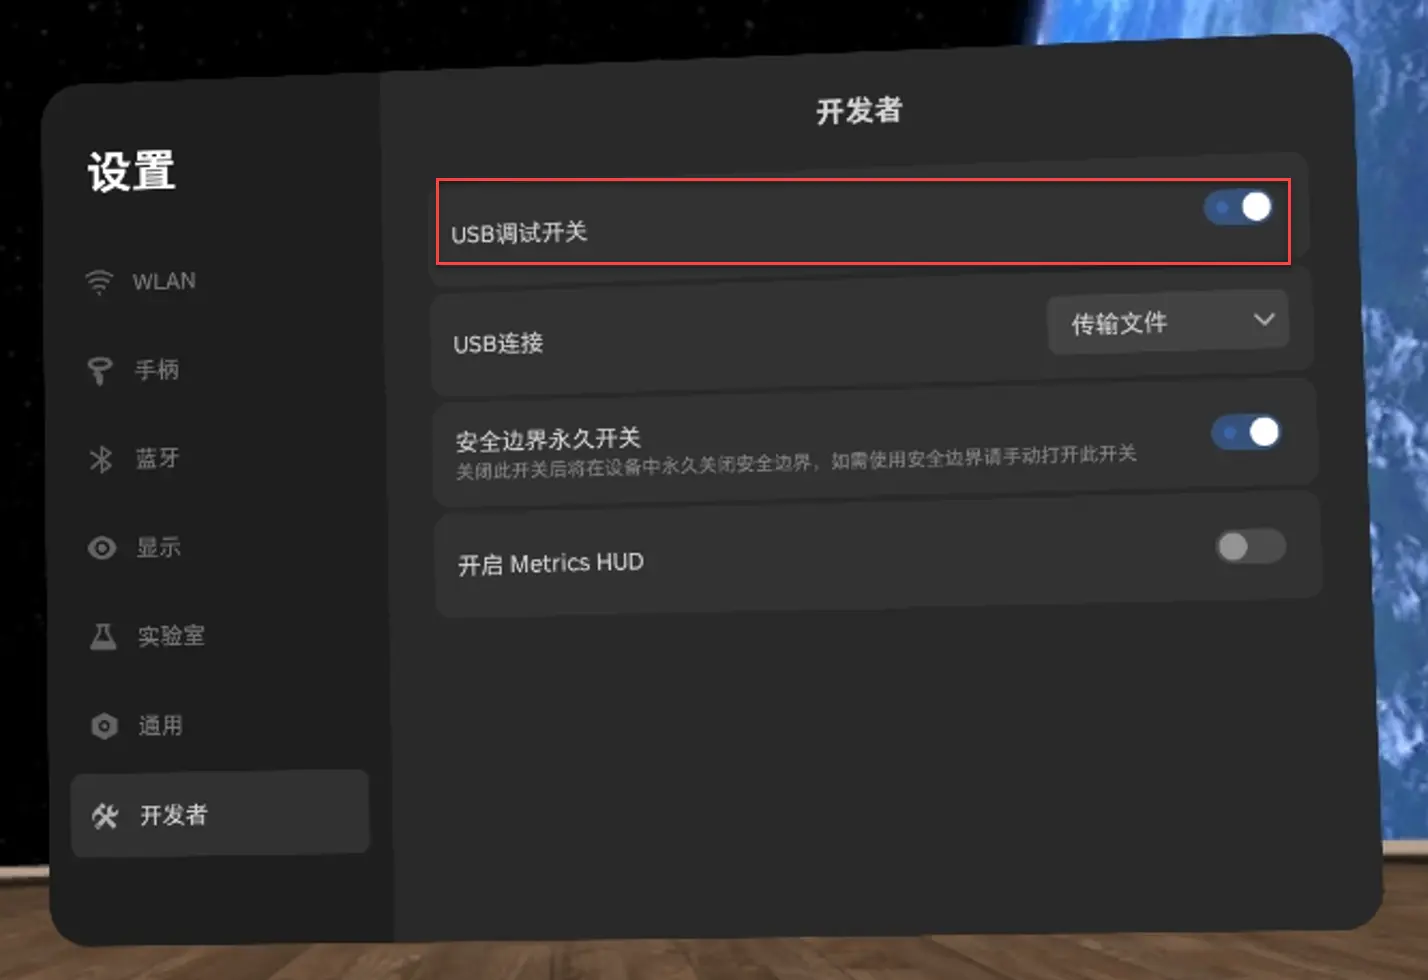
- Open the new Developer option.
- Locate and enable USB debugging.
Step 3: Transfer the App Installation Package#
- Connect the PICO VR headset to the computer with a USB cable.
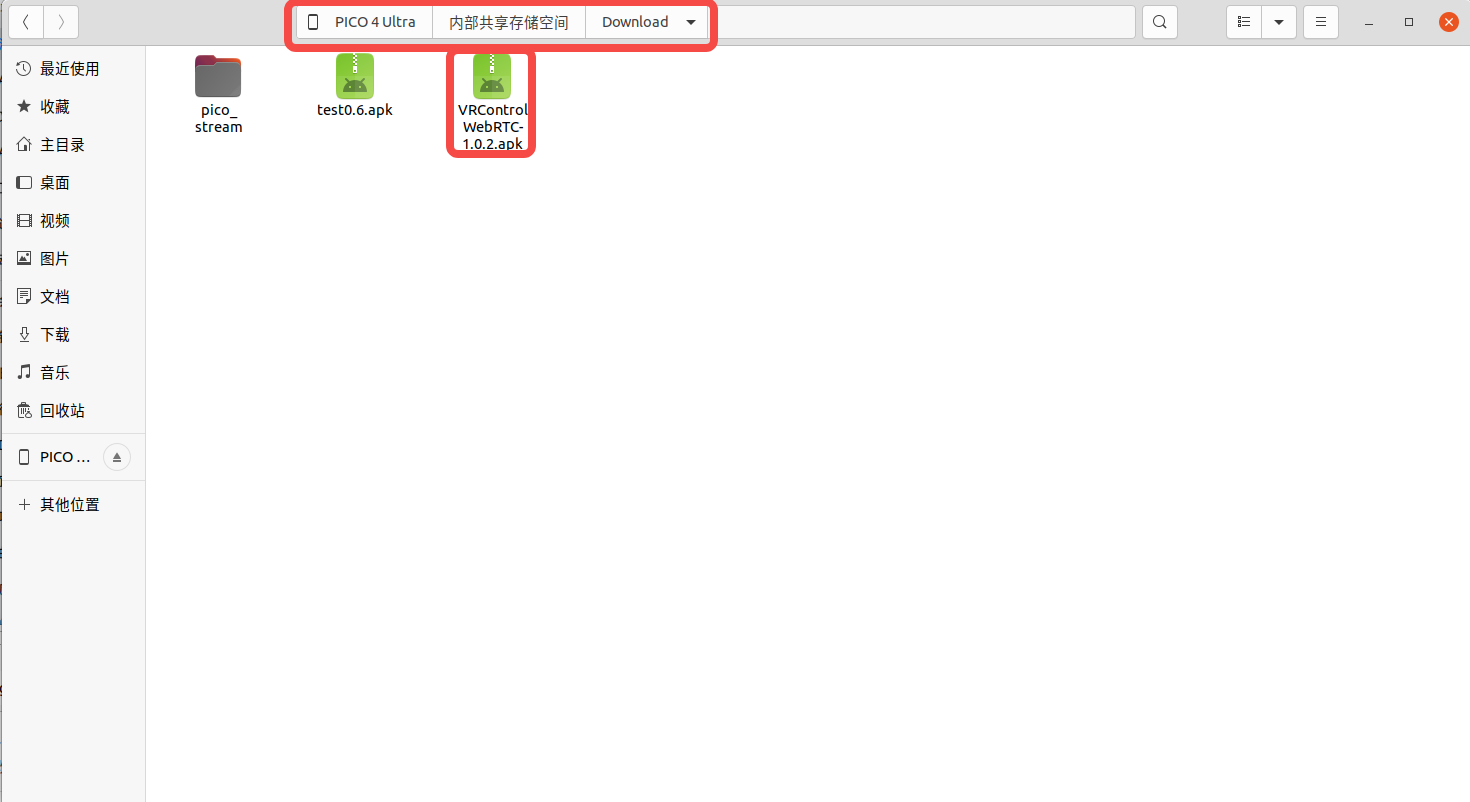
- Copy
VRControl-WebRTC-1.0.2.apkto the PICODownloadfolder, as shown below.
Step 4: Install the App#
- On the PICO VR headset, locate and launch the file manager app.
- In the file manager, locate the package you transferred, select it, and start installation. Select the option to complete the installation.
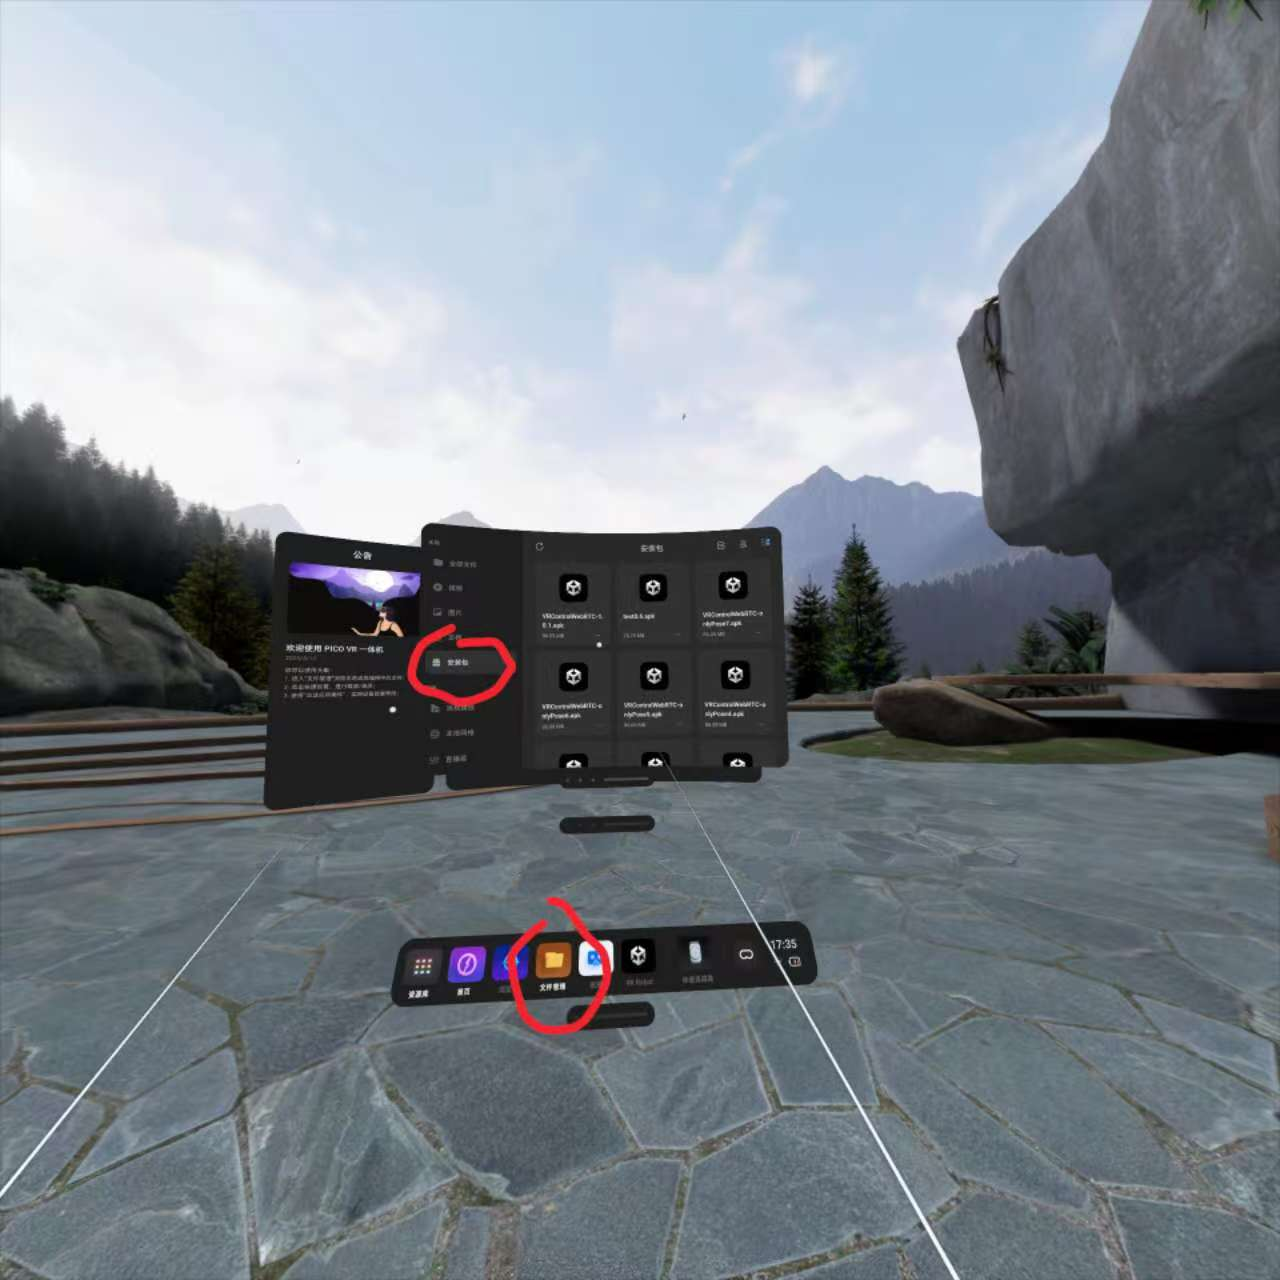
Step 5: Launch the App#
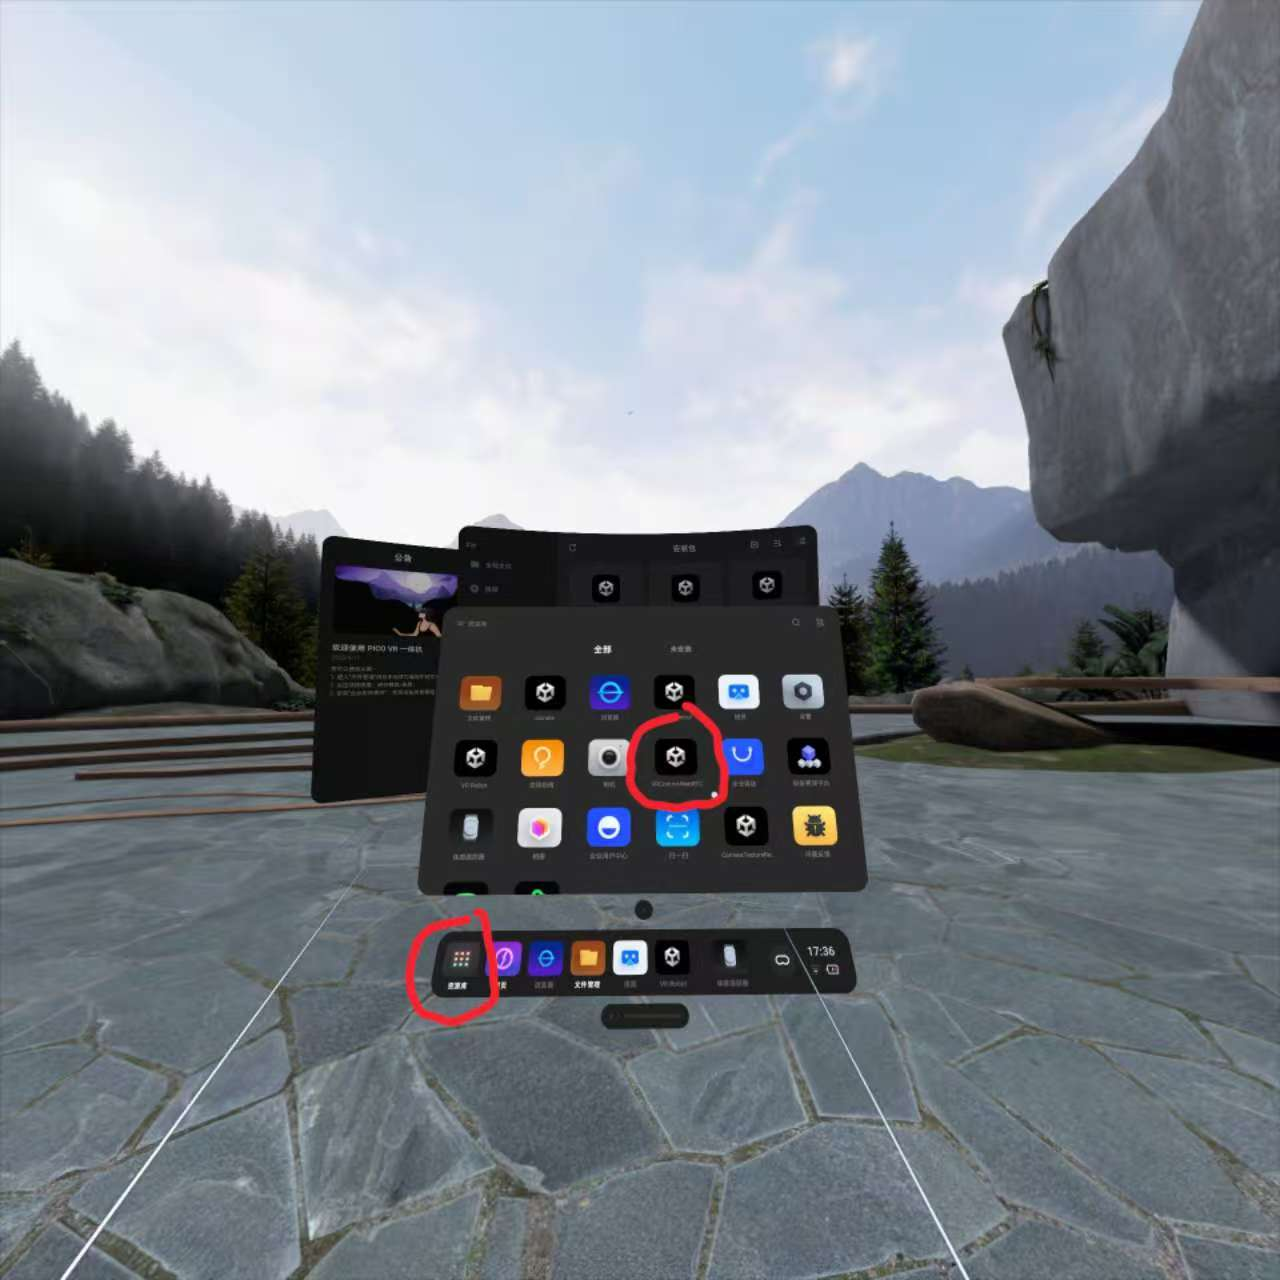
In Library at the lower left, locate and launch the installed VRControl-WebRTC app.
Step 6: Verify the Installation#
-
After the app starts successfully, its main screen or connection-status screen appears.

-
Press the purple circular button on the right controller.