Quick Setup
> Stage 4: VR Device Deployment and Instructions (PICO4)
Yudie Glove Instructions#
Materials#
- Yudie glove receiver
- View the attachment
HandDriver_BV2.1.9_202509171537_Linux_x86_64.zipin the DingTalk document. - View the attachment
setup_usb_permissions.shin the DingTalk document.
Step 1: Install the Software and Configure Permissions#
- Extract the official app: Extract the official Yudie glove software package to a directory of your choice.
- Set permissions for first use: Open a terminal in the extracted directory, run the following commands to configure USB device permissions, and restart the computer for the configuration to take effect.
# Configure USB permissions so that the system can access the glove device
sudo bash setup_usb_permissions.sh

# Restart the computer for the permissions to take effect (required)
sudo reboot

# Make the driver executable
sudo chmod +x ./HandDriver.x86_64
Step 2: Start the Driver and Bind the Receiver#
-
Start the driver:
-
Connect the receiver: Insert the glove's wireless receiver directly into a USB port on the computer.
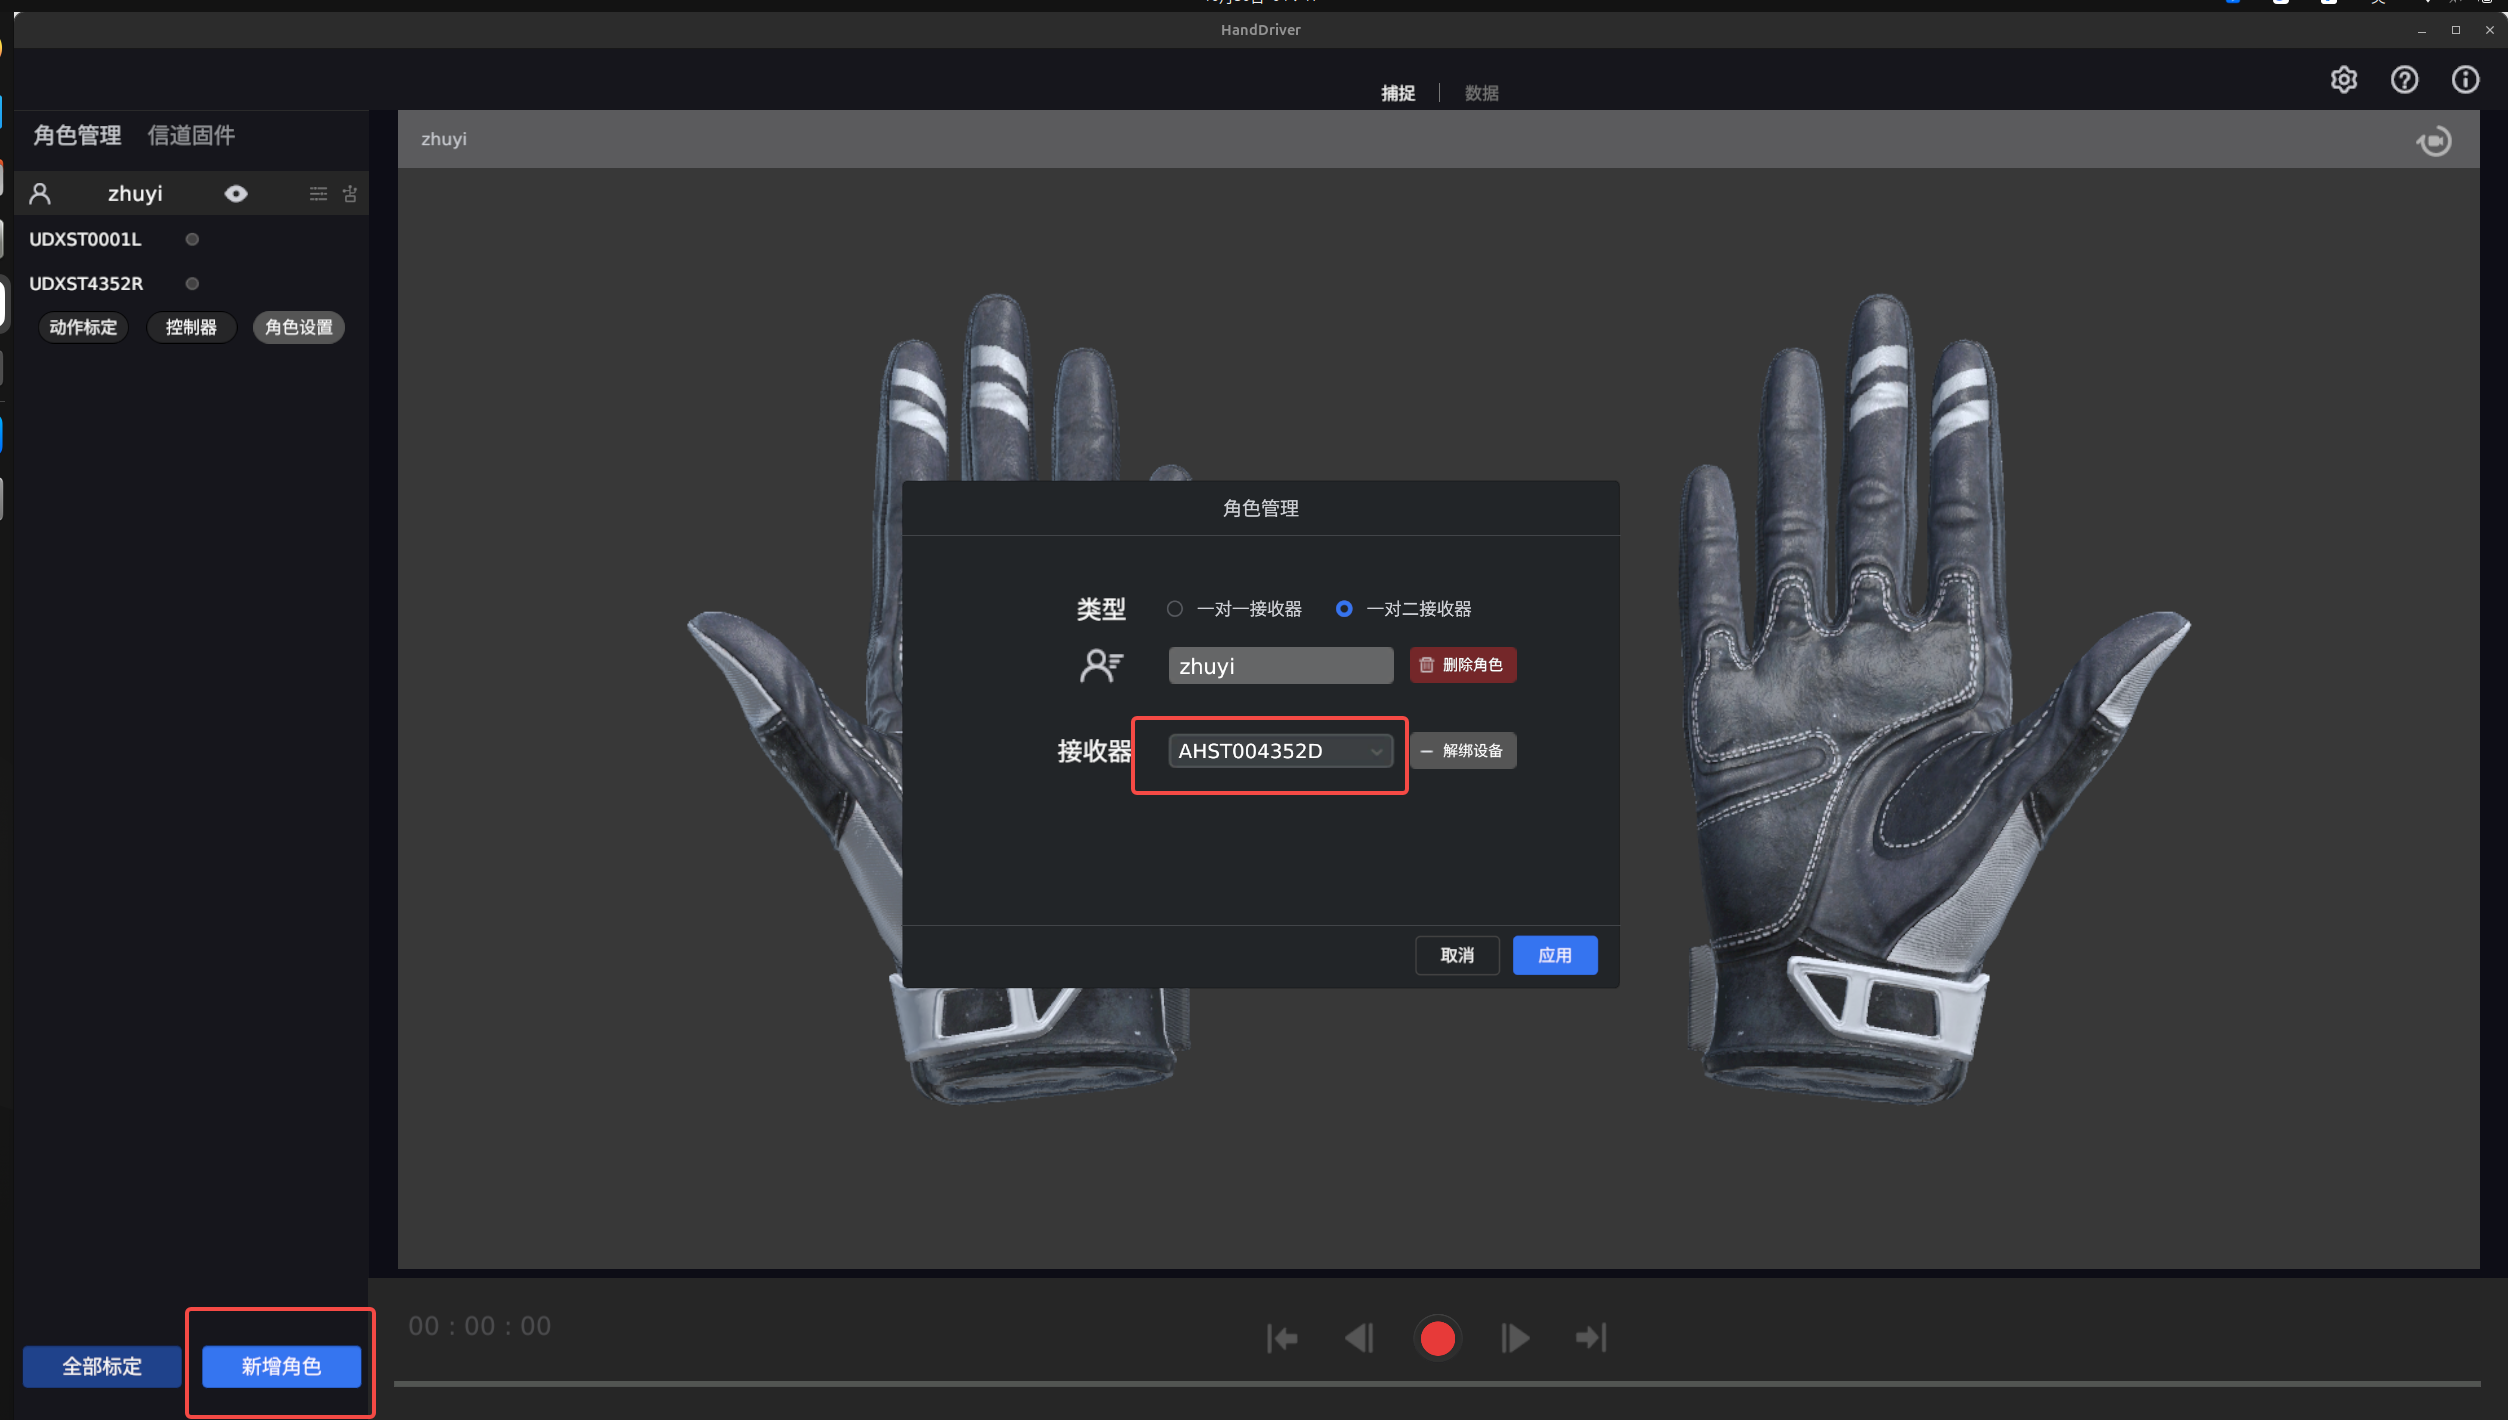
- In the driver's user interface, click New Role, and then bind the inserted receiver to that role, as shown below.
Step 3: Pair and Calibrate the Glove#
Pair the Glove (Complete These Steps for the Left and Right Gloves in Turn)#
- Power on: Briefly press the glove's power button. The blue indicator flashes.
- Enter pairing mode: Press and hold the power button until the green indicator flashes twice repeatedly.
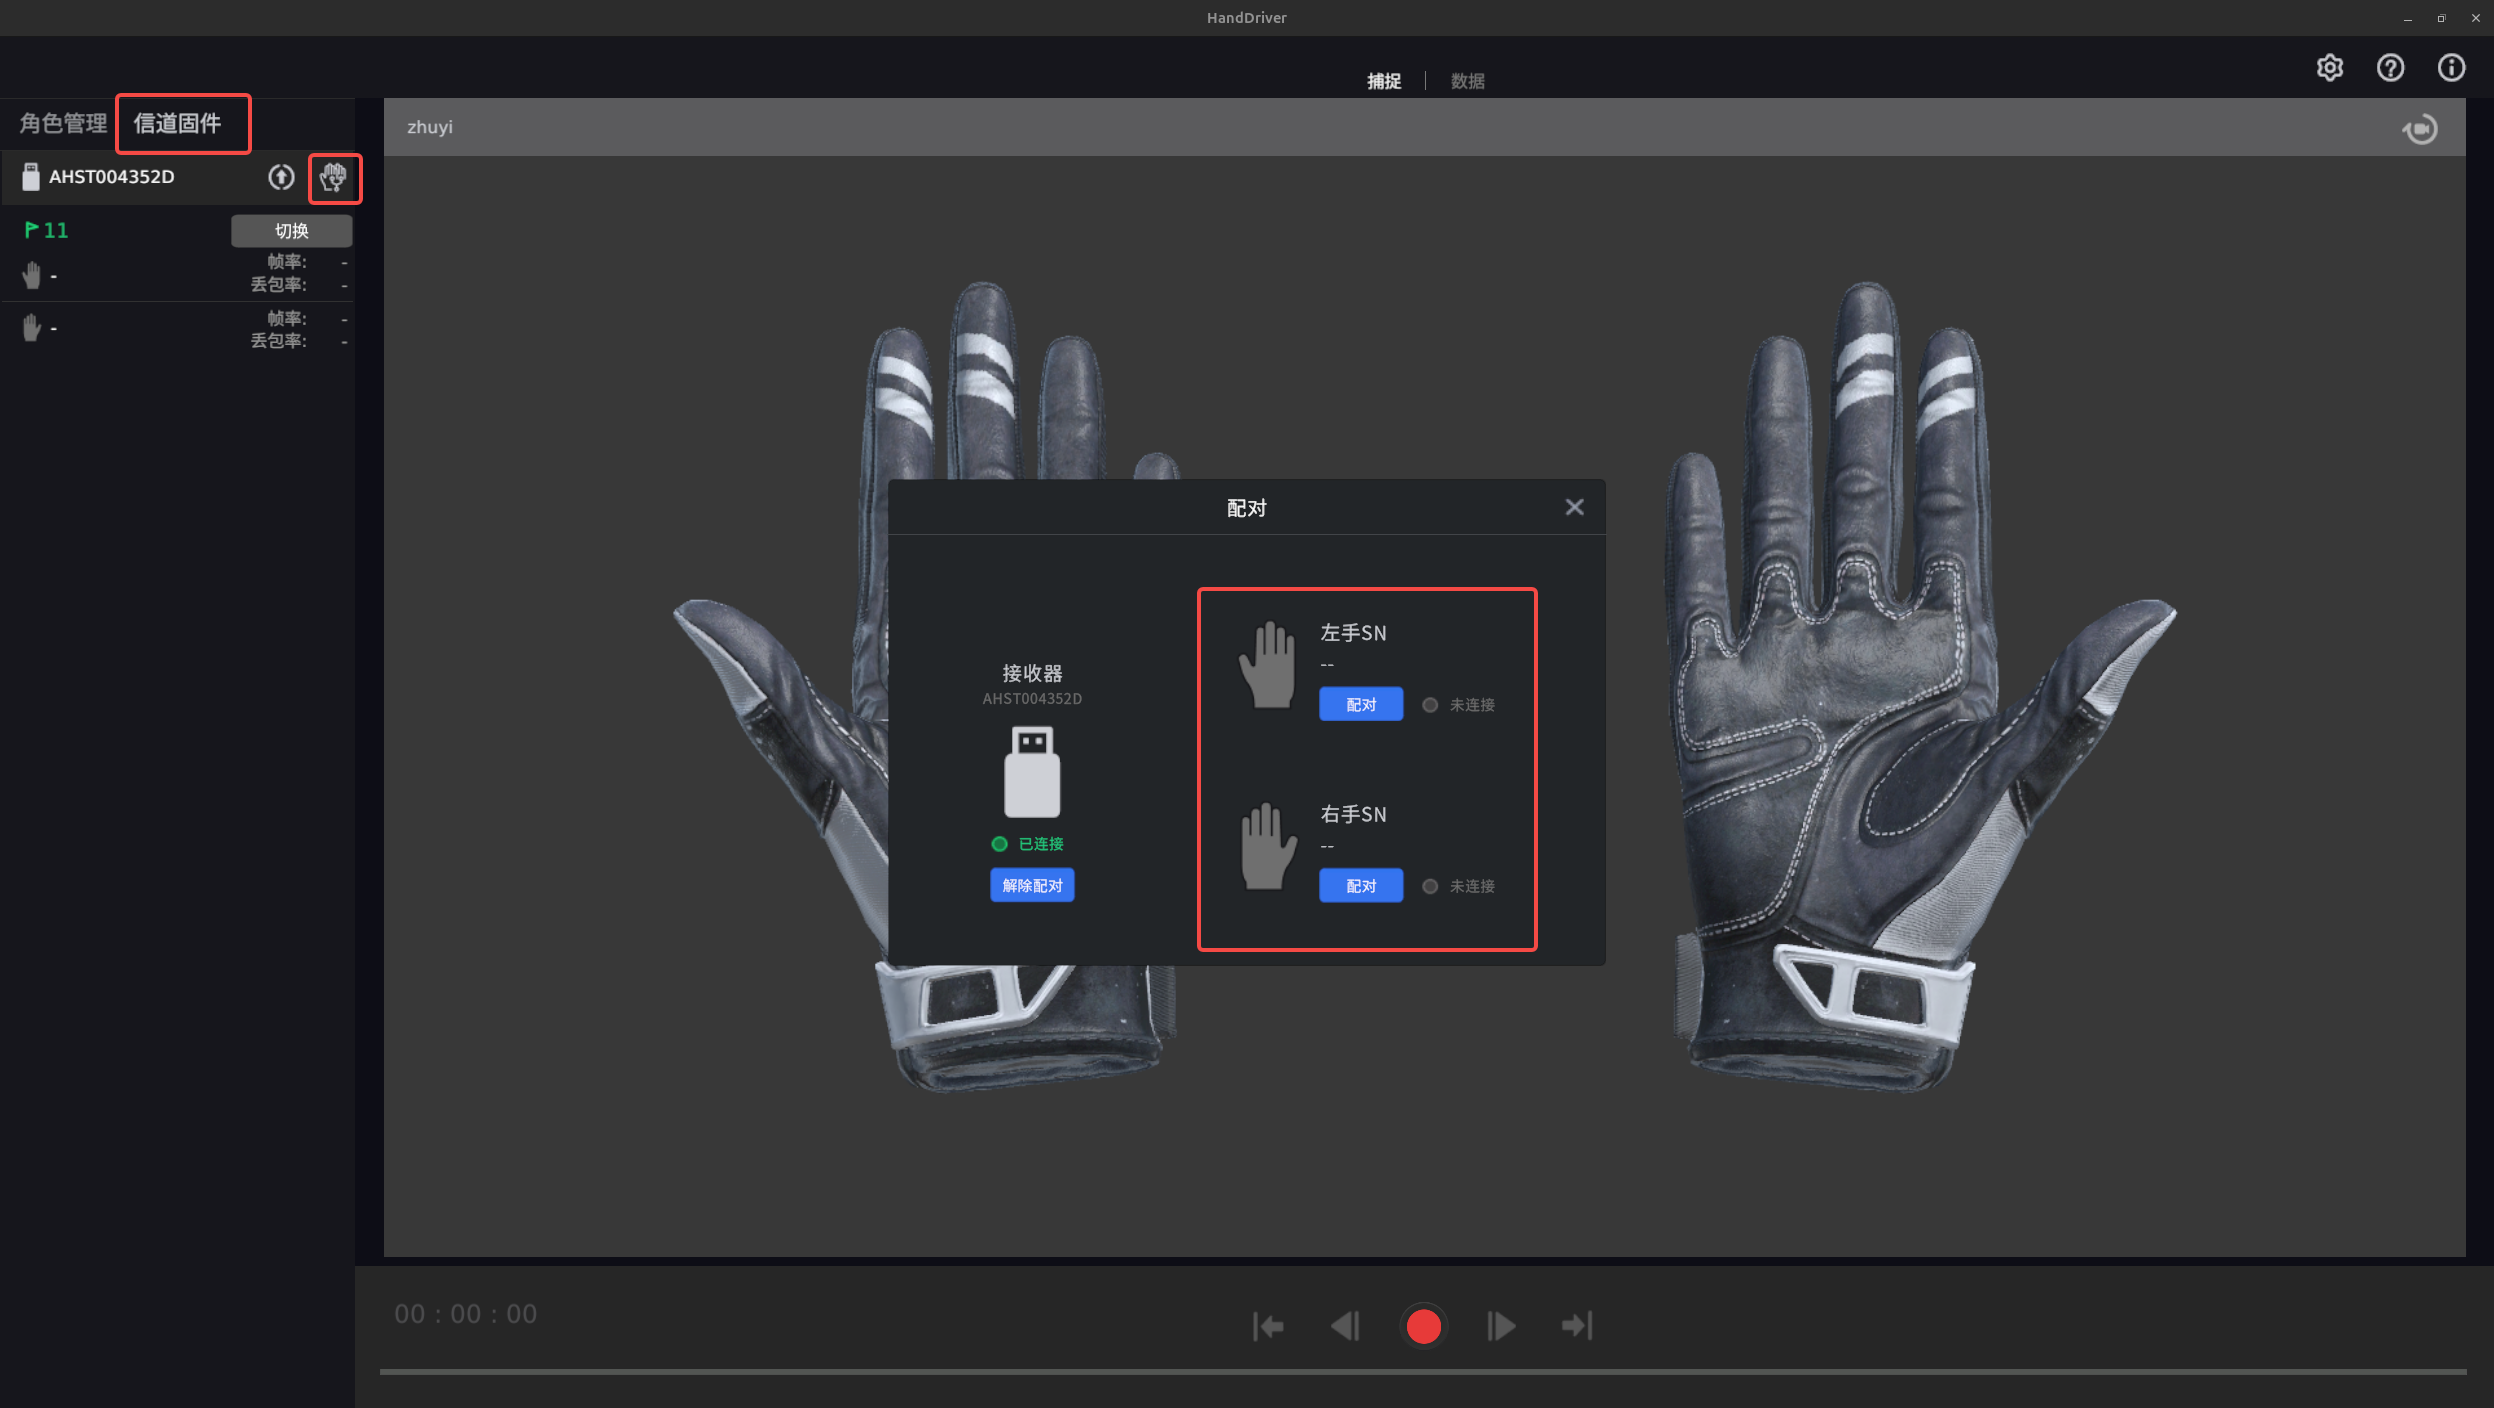
- Pair in the app: On the driver's Channel Firmware tab or a similar tab, click Pair for the corresponding left or right glove.
- Pairing complete: After pairing is complete, the glove indicator should remain solid green.
Calibrate the Glove#
- Connect the paired glove on the driver's main screen.
- Follow the on-screen instructions to complete glove calibration.
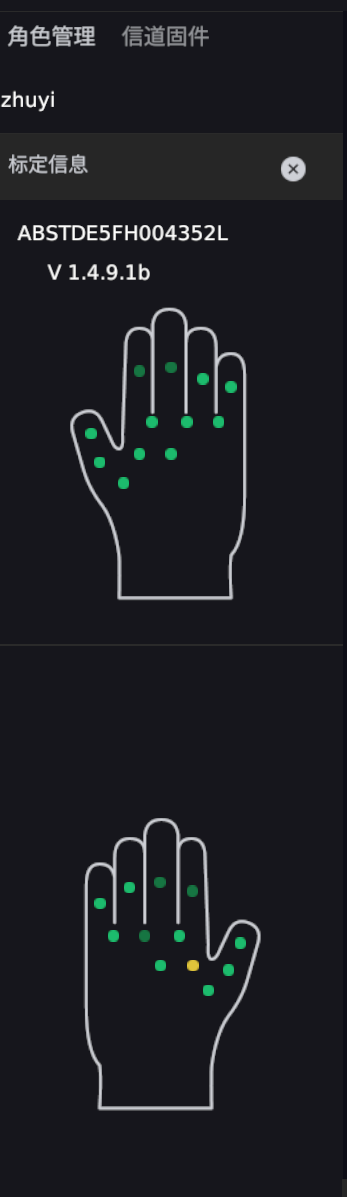
- After calibration, open the Calibration Results screen and check the results. Make sure that no joints are shown in red. For optimal data accuracy, all joints should be shown in green.
| Calibration Result | Calibration Result |
|---|---|
 |
|
Step 4: Configure the Network and Follow the Usage Guidelines#
Configure Data Transmission#
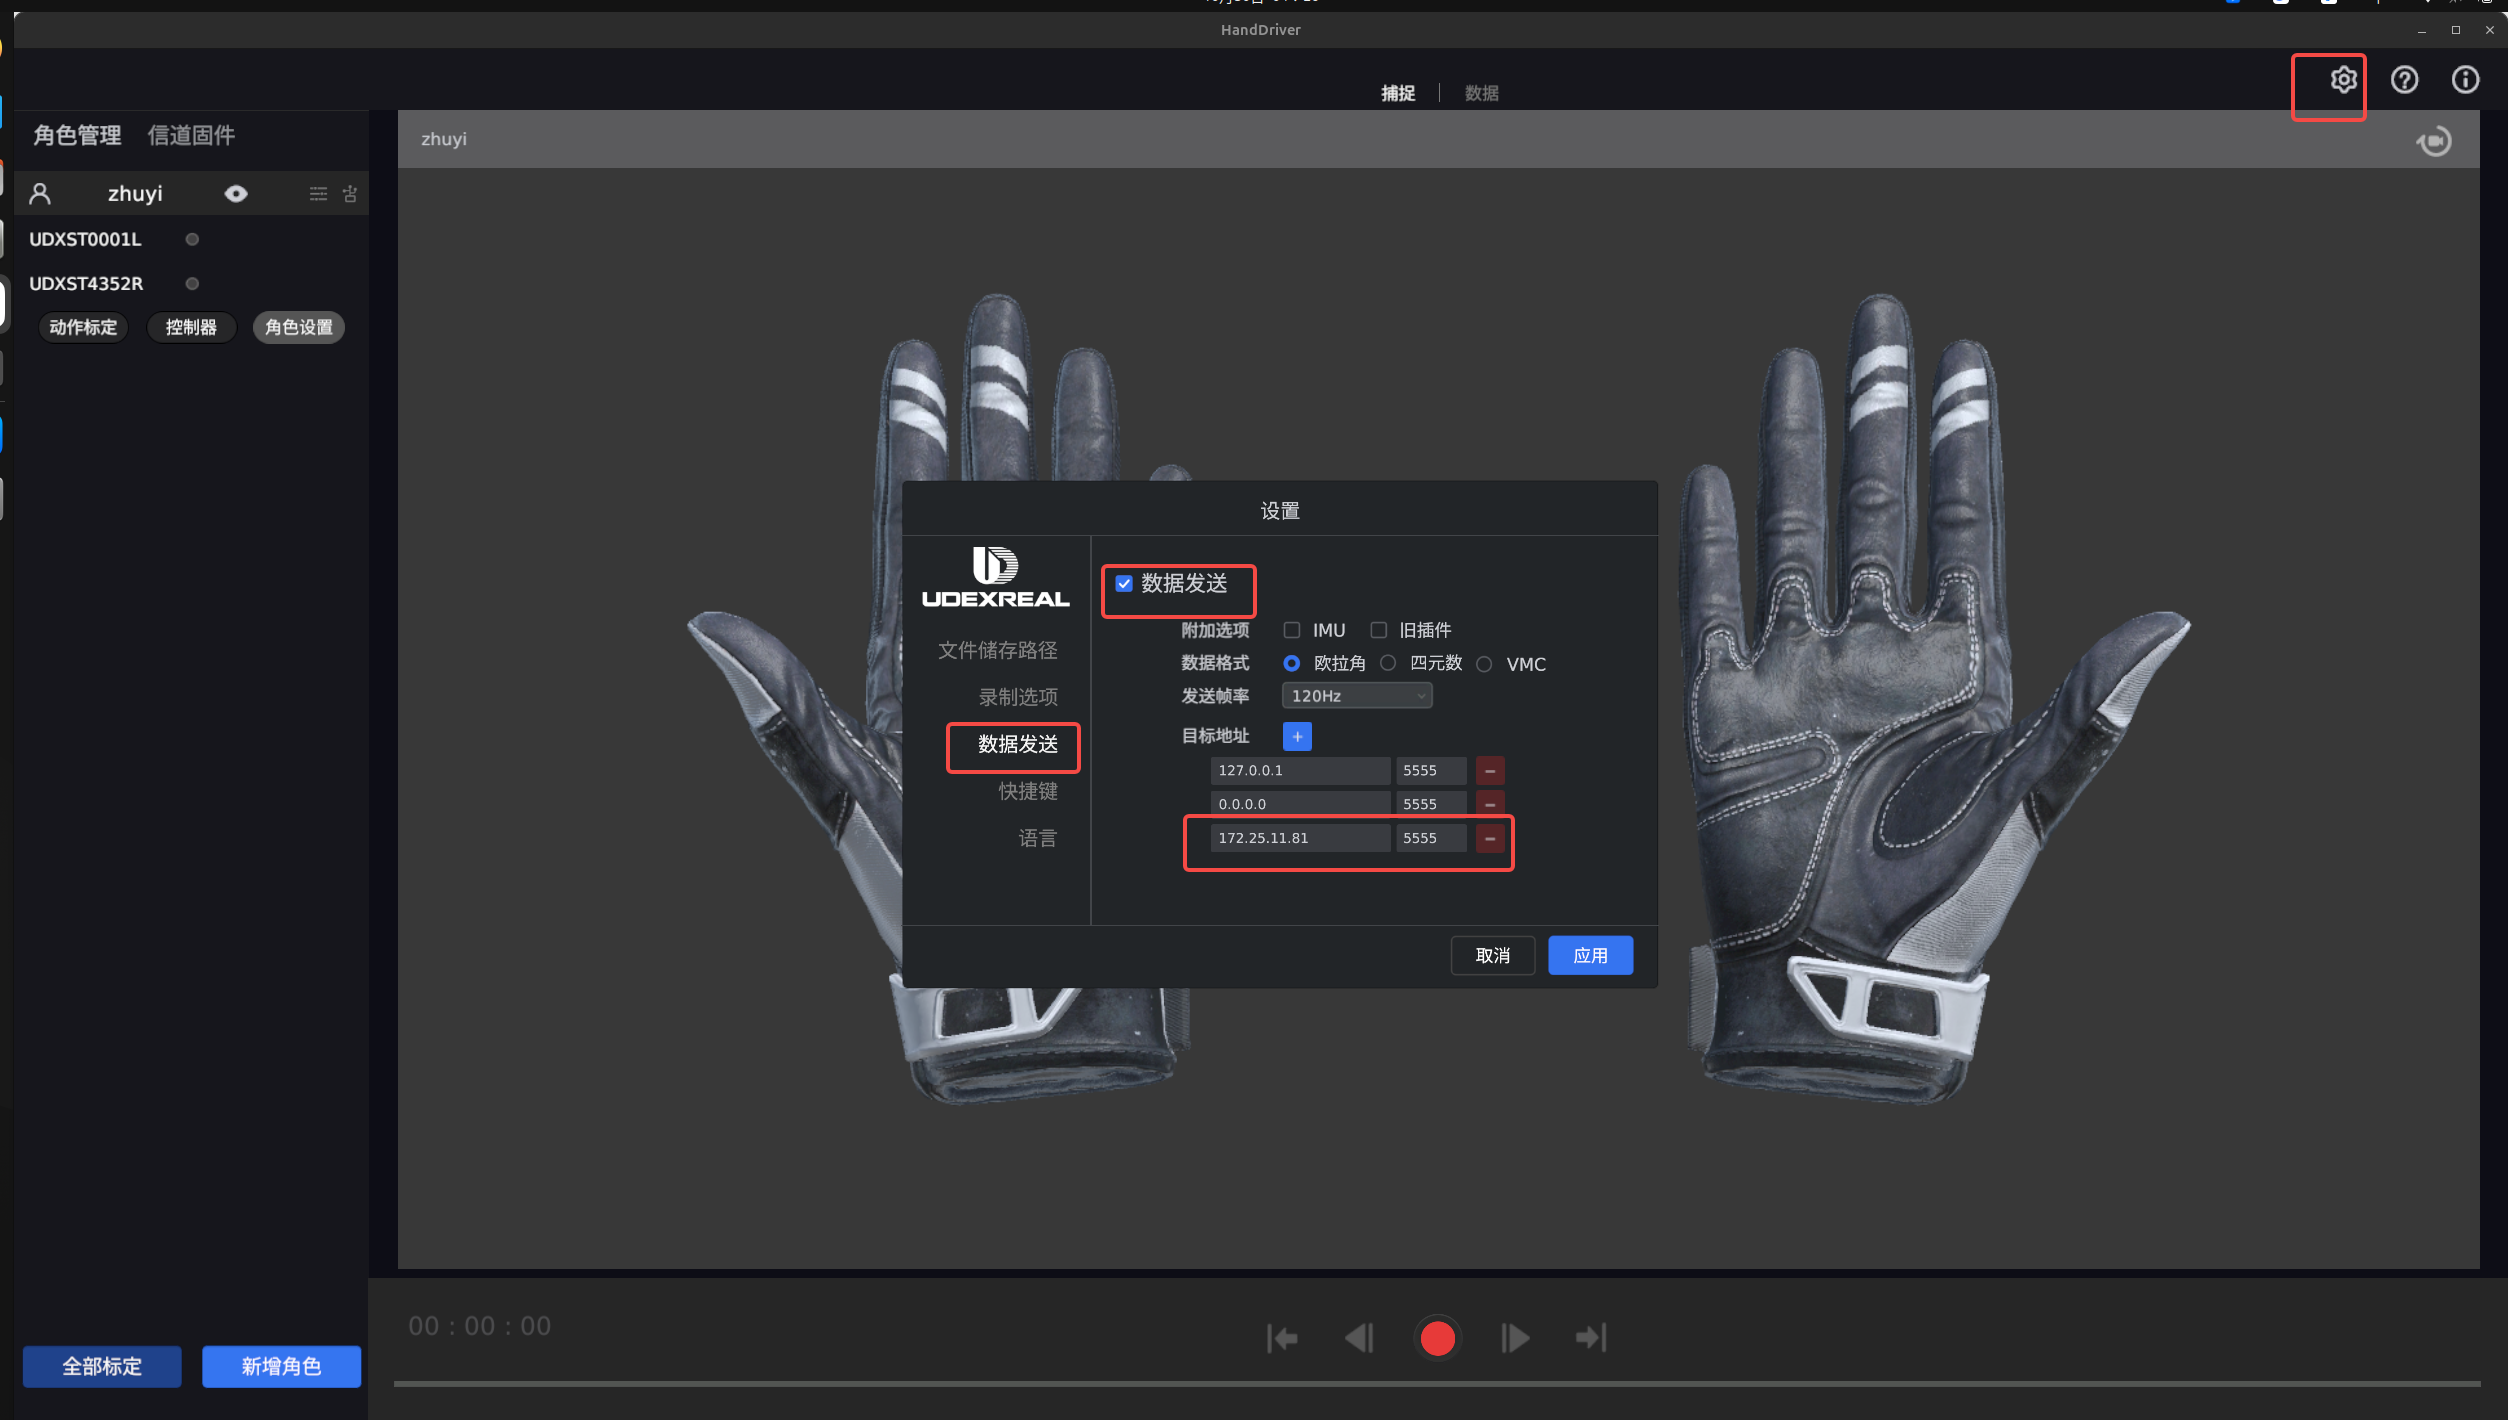
- Open the driver's Settings page.
- Enable Data Transmission.
- Add the destination address (the IP address of the GO2edu NX control board), and make sure that the glove computer and NX board are on the same LAN.
- After use, press and hold the power button until the green indicator turns off to power off the glove. For each subsequent use, insert the receiver before starting the app.
Daily Operating Procedure#
- Power on: Insert the receiver, start the HandDriver app, and then briefly press the glove's power button.
- Power off: After use, press and hold the glove's power button until the green indicator turns off.