SDK Overview and Examples#
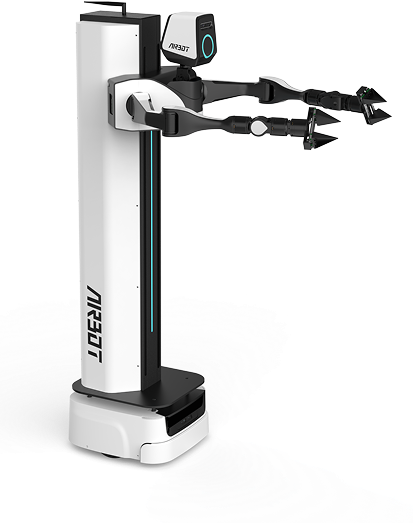
MMK2-SDK: In developer mode, users can control each robot component through this interface. The robot includes built-in control algorithms, on top of which users can develop their own software functions and upper-level applications, such as robot management, autonomous grasping, and mobile manipulation.
Communication Architecture#
The following diagram shows the system components and interactions between the developer computer and robot:
- The developer computer controls robot motion through APIs provided by the upper-level MMK2-SDK.
- The robot's lower-level controller is an Orange Pi running the built-in robot control software.
graph TB
    subgraph "Development Computer / Host Computer"
        subgraph A["Upper-Level Application Development"]
            UI["mmk2-ui<br/>Control Interface"]
            SIM["mmk2-mujoco-sim<br/>Simulator"]
            SDK["mmk2-sdk<br/>(Python)"]
            VIZ["mmk2-urdf-ros2<br/>(rviz2)"]
        end
    end

    subgraph B["Communication Connections"]
        WIRELESS["Wireless Transmission"]
        ROS2["ROS2 cyclonoids<br/>Wired-Port Binding"]
        ETHERNET["External Ethernet Port"]
    end

    subgraph C["MMK2 Robot"]
        OP["Orange Pi (ubuntu 24.04 arm64-arch)"]

        ARMS["Dual Robotic Arms + Grippers"]
        HEAD["Head Motors"]
        LIFT["Lifting Mechanism"]
        BASE["Base"]
        CAMERA["Cameras"]
    end

    %% Connections
    UI --> SDK
    SIM --> SDK
    VIZ --> SDK

    SDK --> WIRELESS
    SDK --> ROS2
    SDK --> ETHERNET

    WIRELESS --> OP
    ROS2 --> OP
    ETHERNET --> OP

    OP --> ARMS
    OP --> HEAD
    OP --> LIFT
    OP --> BASE
    OP --> CAMERA

    %% Style definitions - black text
    classDef host fill:#e1f5fe,stroke:#01579b,stroke-width:2px,color:#000000
    classDef communication fill:#f3e5f5,stroke:#4a148c,stroke-width:2px,color:#000000
    classDef robot fill:#e8f5e8,stroke:#1b5e20,stroke-width:2px,color:#000000
    classDef hardware fill:#fff3e0,stroke:#e65100,stroke-width:2px,color:#000000

    class A,UI,SIM,SDK,VIZ host
    class B,WIRELESS,ROS2,ETHERNET communication
    class C,OP robot
    class ARMS,HEAD,LIFT,BASE,CAMERA hardware
Check the Robot's Wireless IP Address#
Connect the Ethernet cable to your computer, and then log in remotely to the Orange Pi to check the address.
# Test the wired connection
ping 192.168.11.200

# Log in remotely; password: airbot
ssh orangepi@192.168.11.200

# Check the Orange Pi wireless IP address
ifconfig
After recording the wireless IP address, you can disconnect the Ethernet cable and subsequently connect to the robot from the host computer over the wireless network.
Verify Motor Versions#
The motor hardware versions compatible with lower-level controller version 113 are listed below:
| Motor Type | Description | Applicable Joints | Firmware Version |
|---|---|---|---|
| Weight | 6.9 kg | Robotic-arm joints 1–3 | 04114 |
| Degrees of freedom | 6 | Robotic-arm joints 4–6, two head motors, and G2 grippers | 5015 |
Joint Limits#
| Joint Type | Degrees of Freedom | Joint Limits | Description |
|---|---|---|---|
| Robotic arm | 6 | joint1: (-3.14, 2.06) |
Applies to the left and right arms |
| Gripper | 1 | GRIPPER_MIN = 0.0 |
0 -- fully closed |
| Head | 2 | HEAD_YAW_MIN = -0.47 |
|
| Lifting mechanism | 1 | SPINE_MIN = -0.04 |
Examples and Instructions#
After the MMK2 robot powers on and passes its self-check, it is in standby mode. The head and body lights remain solid white, and the base shows a blue breathing light. The host computer can then control the robot through the SDK software.
Run the Examples#
After installing the mmk2-sdk package, run the following example script to become familiar with MMK2 robot control:
Before running the script, confirm the following:
- Robot connection
- Make sure the robot IP address is correct (default: 172.25.14.1).
- Make sure the robot is available for connection.
- Make sure the network connection is working.
- Camera configuration
- Make sure the camera hardware is connected correctly.
- Make sure the camera serial number is configured correctly. You can run
rs-enumerate-devices | grep Serialinside Docker on the Orange Pi to check it. - RGB and depth images are supported.
Functions#
The program displays the following interactive menu. Enter a number to test an SDK function:
============================================================
🤖 MMK2 SDK Examples
============================================================
Select an example to run:
1. Basic usage - connection test and state retrieval
    - Make sure the robot IP address is correct (default: 172.25.14.1)
    - Make sure the robot is available for connection
    - Make sure the network connection is working
2. Robotic-arm control - joint, pose, and gripper control
    - Joint-angle control
    - End-effector pose control
    - Gripper opening/closing control
    - Relative motion control
    - Waypoint control
    - Reset to start/zero pose
3. Base control - forward/backward movement, turns, and lateral movement
    - Move forward/backward
    - Turn left/right
    - Move laterally
    - Move to a specified pose
4. Head control - left/right rotation and up/down pitch
    - Turn the head left/right
    - Pitch the head up/down
    - Return the head to zero
5. Lifting control - spine lifting motion
    - Move the spine up/down
    - Set the height
    - Return the lifting mechanism to zero
6. Camera usage - image acquisition and visualization
    - Start camera streams (head, left-hand, and right-hand cameras)
    - Display RGB images
    - Display depth images
    - Press 'q' to exit
7. TF retrieval - coordinate-frame transformation information
    - Retrieve coordinate-frame transformations
    - Display position and rotation information
    - Support relationships between multiple coordinate frames
8. Error handling - error detection and handling
    - Test invalid parameters
    - Retrieve error information
    - Check error status
    - Clear errors
9. State checking - closed-loop control verification
    - Check joint states
    - Check pose state
    - Check base state
    - Verify closed-loop control
10. Continuous waypoint control - joint and pose trajectories
    - Joint trajectory control
    - End-effector pose trajectory control
0. Exit
============================================================
Enter a selection (0-9):